
Fat
Dough


667 results found with an empty search
- Dalgona Coffee
Jump To Recipe Jump To Video Since I am on a dalgona roll, why not make some actual dalgona coffee? This takes me back to that viral trend timeline. Everyone was jumping on the bandwagon and dalgona coffee was flooding across all social media platforms. Very much like the Basque Burnt Cheesecake and the Sourdough craze. I had explained the origins in my previous Dalgona Overnight Oats recipe. You can check it out if you are intrigued. In the meantime, let's indulge in this awesome coffee. Ingredients: (Serve 1) High Quality Instant Coffee Preferably Little's , 5g Granulated Sugar, 15g Water, 15g Whole Milk or Any Milk of Your Choice, 240g Coffee Liqueur, 1 TBSP or More Raw Cacao Nibs, For Garnishing Equipment: Hand / Stand Mixer Directions: n a large bowl, add instant coffee, sugar and water. Stir to dissolve the coffee and sugar. Use a hand or stand mixer, and whip the coffee mixture until stiff peaks. It will take 10 to 15 mins. Pour milk into a serving glass. Drizzle in the coffee liqueur. Spoon the dalgona coffee over the milk. Sprinkle some cacao nibs over the top. You can serve this immediately or chill it in the fridge until cold. Nostalgic... I'd forgotten how good this tastes... Recipe Video:
- Vietnamese Frappé Martini
Jump To Recipe Jump To Video @vincehomemade is responsible for this recipe and I don't think I can ever look at a typical espresso or coffee martini again. Lol! He was throwing some ideas after he saw my previous Vietnamese Iced Coffee recipe. I was intrigued by this one in particular. So here we are. I used the same coffee ice cubes method, only this time, it is used to shake the cocktail. I didn't add any condensed milk as coffee liqueur is used. You can add if desired. I just find it a bit too sweet and overpowering, in my humble opinion. Anyway, I know it is like 8 in the morning, but who is judging? Cheers! Ingredients: Inspired by @vincehomemade (Serve 1, sadly) Freshly Brewed Coffee, 2 Servings Ice Cubes Coffee Granules, 8g + More For Garnishing Boiling Water, For Coffee Coffee Liqueur, 1 oz Vodka, 1 oz Equipment: Vietnamese Coffee Dripper Ice Cube Tray Martini Glassware Cocktail Shaker Directions: Pour freshly brewed coffee into an ice cube tray. *You can use a normal coffee maker or a moka pot to brew your coffee.* Freeze in the freezer until frozen solid. When about to serve add some normal ice cubes into martini glassware to keep it chilled. Place the spanner onto a serving cup. Followed by the chamber. Add coffee granules into the chamber. Give it a light shake to even out. Place the insert on top of the coffee. Pack it down tightly. *If your insert is the screw-on type, screw it down tightly and release it just a bit.* Add 1 to 2 TBSP of boiling water into the chamber. *Water has to be boiling.* Let it sit for 30 secs. Pour boiling water into the chamber in a circular motion. Fill it up just below the brim. Place on the cap and watch it drip. Once the dripping stop, remove the cap and place it upside down on a table. Remove the dripper and place it onto the cap. *You can find out more about the Vietnamese dripper parts here .* Add the frozen coffee ice cubes into a cocktail shaker, followed by the Vietnamese coffee. Add in the coffee liqueur and vodka. Slam the lid tightly and shake until well combined and foamy. Discard the ice cubes from the glassware and strain the martini into the glassware. Garnish with some more coffee granules. Cheers! Cheers! Recipe Video:
- Orange Vietnamese Coffee
Jump To Recipe Jump To Video This beverage is inspired by Dan McLaughlin aka @softpourn . You can check out his videos on TikTok for awesome coffee ideas. I am not sure what to think of this coffee; it is a love or hate affair. At 1st sip, I thought it was bizarre, but the more sips I drank, I began to like it in a weird way. This is the kinda beverage that you need to give a shot at and find out for yourself. It is all up to your palate. This is not the original recipe. This is just my inspired version, you have to check it out on @softpourn 's TikTok page for the original recipe (sadly, I cannot find the direct link). If I am not wrong, he uses espresso, ice cubes, orange slices and sparkling water. I hope you will give this idea a try. Cheers! Ingredients: Inspired by Dan McLaughlin aka @softpourn (Serve 1, sadly) Orange Slices, For Ice Cubes Fresh Orange Juice, 1 Orange Coffee Granules, 8g Boiling Water, For Coffee Sparkling Water, For Coffee Equipment: Vietnamese Coffee Dripper Ice Cube Tray Directions: Pour some water into an ice cube tray. Slice the orange slices into small triangles and sink them into the water. Freeze in the freezer until frozen solid. Once the coffee ice cubes are frozen, place the spanner onto a cup. Followed by the chamber. Add coffee granules into the chamber. Give it a light shake to even out. Place the insert on top of the coffee. Pack it down tightly. *If your insert is the screw-on type, screw it down tightly and release it just a bit.* Add 1 to 2 TBSP of boiling water into the chamber. *Water has to be boiling.* Let it sit for 30 secs. Pour boiling water into the chamber in a circular motion. Fill it up just below the brim. Place on the cap and watch it drip. Once the dripping stop, remove the cap and place it upside down on a table. Remove the dripper and place it onto the cap. Pour the coffee into a pitcher and set it aside. Add the orange ice cubes into a serving cup. Pour in the orange juice, followed by Vietnamese coffee. And lastly, some sparkling water to fill up the cup. Give it a stir and enjoy. Cheers! Will you give it a try? Recipe Video:
- Vietnamese Mocha Martini
Jump To Recipe Jump To Video Here's another recipe inspired by @vincehomemade . We were having a little chat after our last endeavor ( Vietnamese Frappé Martini ); I guess we were just throwing ideas in the air. I decided to put this intriguing idea into fruition. And I am so glad I did. This is definitely not for the faint of heart as this is super intense with dark chocolatiness with a coffee kick. There is a little surprise after drinking: a dark chocolate truffle (for anyone who you are making this beverage for). I hope you will give this crazy idea a try. Cheers! Ingredients: Inspired by @vincehomemade (Serve 1, sadly) Freshly Brewed Coffee, 2 Servings Ice Cubes Coffee Granules, 8g Boiling Water, For Coffee Dark Chocolate Liqueur Preferably Mozart , 1 oz Vodka, 1 oz Dark Chocolate Truffle Preferably Lindt , 1 Raw Cacao Nibs, For Garnishing Equipment: Vietnamese Coffee Dripper Ice Cube Tray Martini Glassware Cocktail Shaker Directions: Pour freshly brewed coffee into an ice cube tray. *You can use a normal coffee maker or a moka pot to brew your coffee.* Freeze in the freezer until frozen solid. When about to serve add some normal ice cubes into martini glassware to keep it chilled. Place the spanner onto a serving cup. Followed by the chamber. Add coffee granules into the chamber. Give it a light shake to even out. Place the insert on top of the coffee. Pack it down tightly. *If your insert is the screw-on type, screw it down tightly and release it just a bit.* Add 1 to 2 TBSP of boiling water into the chamber. *Water has to be boiling.* Let it sit for 30 secs. Pour boiling water into the chamber in a circular motion. Fill it up just below the brim. Place on the cap and watch it drip. Once the dripping stop, remove the cap and place it upside down on a table. Remove the dripper and place it onto the cap. *You can find out more about the Vietnamese dripper parts here .* Add the frozen coffee ice cubes into a cocktail shaker, followed by the Vietnamese coffee. Add in the dark chocolate liqueur and vodka. Slam the lid tightly and shake until well combined and foamy. Discard the ice cubes from the glassware and place the chocolate truffle into the glassware. Strain the martini into the glassware. Garnish with some raw cacao nibs. Cheers! Cheers! Recipe Video:
- Hummus
Jump To Recipe Jump To Video I know that there are thousands upon thousands of hummus recipes out there. But this is my go-to hummus recipe. It never fails to impress me every time I make it, and it also never ceases to amaze me whenever I have it. I'm not bragging. Even my youngest daughter, who is a meat lover, adores this vegan dish. I honestly find that it yields better results with fresh chickpeas as compared to canned ones. But if you are in a rush, feel free to use canned ones. The trick is to add cold water while the ingredients are blitzing away in the food processor. You have to judge the amount of cold water to add because different brands of chickpeas react differently. The end result is a creamy and smooth consistency. If you desire a mashed-potatoes-kinda-smooth consistency, I would recommend a stick blender instead of a food processor. I would always top my hummus with some shatta oil to sorta bring everything together. And of cos, I would suggest serving this lovely hummus with some Angie's Tempeh Chips (if you are residing in Singapore). Ingredients: (Serve 4) Chickpeas, 125g Baking Soda, 1/2 TSP Tahini, 135g Fresh Lemon Juice, 1/2 Lemon Garlic, 2 Cloves Cold Water, 50g or More Sea Salt, Pinch Black Pepper, Pinch Shatta Homemade , 1 TBSP Good Quality Extra Virgin Olive Oil, 1 TBSP Pita / Angie's Tempeh Chips Preferably, For Serving Equipment: Sauce Pot Food Processor Directions: Please visit my " How To Make Shatta " page for the recipe. In a bowl, add chickpeas and water. Make sure that the chickpeas are fully submerged. Cover and set aside overnight. The next day, the water should almost dry out and the chickpeas should be slightly doubled in size. Drain and discard the liquid. Transfer the chickpeas into a sauce pot. Add in baking soda and 800g of water. Turn the heat up to medium and give it a stir until the baking soda has dissolved. Bring it up to a simmer. Turn the heat down to low and continue cooking for about 30 to 40 mins, or until the chickpeas are soft. *Remove any foam and skins that float to the top. Add more hot water if necessary.* *If you are using canned chickpeas, skip the above process.* Once the chickpeas are cooked and softened, drain and discard the liquid. Transfer the chickpeas into a food processor and blitz. Add in the tahini, lemon juice and garlic. Blitz. While blitzing, stream down the cold water. You should get a creamy and smooth consistency. *Add more cold water if necessary.* Transfer into a serving bowl. Taste and adjust for seasoning with salt and pepper. In another small bowl, combine shatta and olive oil. Drizzle the shatta mixture over the hummus. Serve immediately with some pita or preferably Angie's Tempeh Chips . You can keep it chilled in the fridge for up to 3 days. Sit at room temperature for 30 mins before serving. Angie's Tempeh Chips ... You can use pita, but if you are in Singapore, why not give Angie's Tempeh Chips a try? Recipe Video:
- Vietnamese Mocha
Jump To Recipe Jump To Video Ever since my Vietnamese Mocha Martini recipe, I can never look at Mocha the same way again. I blame it all on the genius @vincehomemade . I have to make Mocha with Lindt dark chocolate truffles and I don't think I can make Mocha any other way again. This is because this is super chocolatelicious! This is what I want from a Mocha beverage; a coffee kick, chocolatey, almost like a hot chocolate, but it is not. You should know what I'm trying to say. Anyway, let's raise a toast. Cheers! Ingredients: Inspired by @vincehomemade (Serve 1, sadly) Coffee Granules, 8g Boiling Water, For Coffee Dark Chocolate Truffle Preferably Lindt , 6 or More Whole Milk, For Serving Cocoa Powder, For Dusting Equipment: Vietnamese Coffee Dripper Milk Frother Directions: Place the spanner onto a serving cup. Followed by the chamber. Add coffee granules into the chamber. Give it a light shake to even out. Place the insert on top of the coffee. Pack it down tightly. *If your insert is the screw-on type, screw it down tightly and release it just a bit.* Add 1 to 2 TBSP of boiling water into the chamber. *Water has to be boiling.* Let it sit for 30 secs. Pour boiling water into the chamber in a circular motion. Fill it up just below the brim. Place on the cap and watch it drip. While the coffee is dripping, transfer the chocolate truffles into a serving cup and set it aside. Froth and steam milk. Once the dripping stop, remove the cap and place it upside down on a table. Remove the dripper and place it onto the cap. *You can find out more about the Vietnamese dripper parts here .* Pour the coffee over the chocolate truffles. Followed by the milk. Spoon some milk foam over the top and dust with some cocoa powder. Cheers! Cheers! Recipe Video:
- How To Make Perfect Pasta
Jump To Recipe Jump To Video I am not saying that this is the most perfect way to make the best pasta, what I meant is, that this is the best way to make perfect pasta every single time. There are millions upon millions of pasta recipes online. Some would debate that making fresh pasta is the best option, but I beg to argue. A close up... I personally find that fresh pasta is too rich. Imagine using fresh pasta to make carbonara, it is just too rich. The best Michelin Starred restaurants in Italy use dried pasta. Maybe they are sending us a message that dried pasta trumps fresh ones. So, dried pasta it is. But how to choose the best dried pasta? You will get all the information you need in the recipe video below. I mean, a video paints a thousand words. Expensive branded pasta doesn't mean that they are of high quality, not necessarily. Do keep that in mind. After we get the correct pasta out of the way, let's talk about the water, salt and olive oil. The correct ratio is 100g of pasta to 1L of water with loads of salt and oil, right? It is not exactly right, however. After years of cooking pasta, I find that the shorter you cook the pasta, the creamier the texture is. So what is the correct ratio? 100g of pasta to 400g of hot water. Yes! Hot water will shorten the cooking process. As for salt? Do not add until the water tastes like the ocean, just a pinch will do. Lastly, no oil. Adding oil while cooking will make the pasta super greasing and the sauce will not cling. Now, it is down to the ingredients. Remember less is always more, very much like pizza. Today, I am using some slow-roasted cherry tomatoes, a bit of cheese and herbs with a touch of lavender. As the Pasta Queen will say, just gorgeous... Ingredients: (Serve 2) Cherry Tomatoes Preferably With Vines, A Large Handful High Quality Olive Oil, For Brushing Sea Salt, Pinch Black Pepper, Pinch Good Quality Spaghetti, 100g Tomato Sauce Homemade , 1/4 Cup Dried Lavender, Pinch Fresh Mozzarella, A Few Pinches Basil Corasely Chopped, A Handful Parmigiano Reggiano, Freshly Grated Extra Virgin Olive Oil, A Drizzle Equipment: Cast Iron Skillet / Pan Oven Directions: Please visit my " How To Make Tomato Sauce " page for the recipe. Preheat the oven to 100 degree celsius or 210 fahrenheit. Place the tomatoes onto a baking dish vine side down. Brush with olive oil. Season with salt and pepper. Wack into the oven and bake for about 2 to 2.5 hrs or until the skins of the tomatoes start to shrivel like a raisin but are still plump and juicy. *Check at the 1.5 hr mark.* Remove from the oven and set aside until ready to use. In a skillet over medium heat, add 400g of hot water. Add in the spaghetti. Gently pluck the tomatoes from their vines and toss the vines into the pasta mixture. *Doing so, will add more tomato flavors to the pasta.* Season with salt and cook until the spaghetti is al dente. With the simple calculations of math and science, by the time the pasta is al dente, the water has almost evaporated. Immediately transfer the pasta mixture to the cherry tomatoes. Toss and deglaze. Add in the rest of the ingredients. Toss until everything has been fully incorporated. Serve immediately. Mama Mia... Recipe Video:
- Fried Ice Cream Sandwich
Jump To Recipe Jump To Video While having my homemade avocado ice cream, this is the 1st idea that popped into my mind. I used to make this whenever I have some leftover ice cream. And I know that you are judging me for having leftover ice cream. Lol! This makes an excellent treat! The trick is not to overfill and to seal the edges tightly and properly. You do not want ice cream leaking out during the deep frying process. Trust me. Another important note is the oil temperature. Always check the temperature by sticking a wooden chopstick into the oil. If bubbles start to form around the chopstick, the oil is ready for deep frying. I decided to take things up a notch by spreading some chocolate sauce. You will get a hot, cwispy, crunchy, old, creamy, chocolaty, coconuty and avoy sensation. You have to give this recipe a try to find out. Ingredients: (Serve 1) High Quality Dark Chocolate Preferably Valrhona or Callebaut, 50g Coconut Oil, 20g Instant Coffee, Pinch Fresh Orange Zest, 1/2 Orange Hazelnuts Coarsely Chopped, 20g Rapeseed / Peanut / Sunflower / Canola Oil, For Frying Sandwich Bread, 2 Slices Avocado Ice Cream Homemade / Any Store Bought Ice Cream 1 Large Scoop Egg Lightly Beaten, 1 Desiccated Coconut, For Dredging Equipment: Dutch Oven / Deep Fryer Large Cast Iron Skillet / Pan Double Boiler Directions: Please my " Avocado Ice Cream " page for the recipe. Melt the chocolate on a double boiler . Once melted, remove from heat and add in the coffee, orange zest and hazelnuts. Mix until well combined and set aside. Add about 4 inches of oil to a dutch oven over medium heat. Slice and remove the crusts from the bread. *You can use the crusts for bread crumbs, or simply dredge them into beaten egg, desiccated coconut and deep fried them. Serve the crust sticks with any leftover chocolate sauce* Pinch the 4 edges of each slice of bread. Spread the chocolate mixture onto each slice of bread. Place some avocado ice cream onto the center of 1 bread. Sandwich together and pinch the 4 edges tightly together to seal properly. *That is crucial as the ice cream will leak and create a huge mess during the frying process.* Dredge the sandwich onto the beaten egg, coating well. Followed by the desiccated coconut. *To check the temperature, insert a wooden chopstick into the oil. If bubbles start to form, not rapidly, the temperature is ready.* Place the dredged sandwich onto a spider and gently drop it into the oil. Deep fried until golden brown on both sides. Remove from heat and drain off excess oil on a wire cooling rack or on a plate lined with kitchen paper. Serve immediately. Hot, cwispy, crunchy, old, creamy, chocolaty, coconuty and avoey sensation... Mama Mia... Don't waste the crust. Make bread sticks and dip them into any leftover chocolate sauce... Recipe Video:
- Vietnamese Affogato
Jump To Recipe Jump To Video Every time I had an affogato, I always get disappointed by the taste and result. I seriously don't know why. Maybe perhaps, ice cream and hot espresso or coffee do not go well together? Or maybe it is the ingredients of the ice cream? Hmm... Despite those countless disappointments, I still go ahead with my homemade avocado ice cream. To my surprise, it works! The pairing goes so well together. Perhaps the ingredients of typical regular vanilla ice cream do play a part? Or perhaps, avocado and coffee are match-made? Hmm... Ingredients: (Serve 1, sadly) Coffee Granules, 8g Boiling Water, For Coffee Avocado Ice Cream Homemade , 1 Large Scoop Equipment: Vietnamese Coffee Dripper Directions: Please visit my " Avocado Ice Cream " page for the recipe. Scoop the avocado ice cream into a serving cup. Place the spanner over the serving cup. Followed by the chamber. Add coffee granules into the chamber. Give it a light shake to even out. Place the insert on top of the coffee. Pack it down tightly. *If your insert is the screw-on type, screw it down tightly and release it just a bit.* Add 1 to 2 TBSP of boiling water into the chamber. *Water has to be boiling.* Let it sit for 30 secs. Pour boiling water into the chamber in a circular motion. Fill it up just below the brim. Place on the cap and watch it drip. Once the dripping stop, remove the cap and place the dripper on the cap. *You can find out more about the Vietnamese dripper parts here .* Give it a stir Cheers! Cheers! Recipe Video:
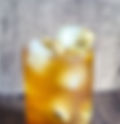
- Chrysanthemum Tea
Jump To Recipe Jump To Video The insane heatwave is slowly melting me away. Climate change is inevitable. But what we are doing is actually speeding up the process, rapidly. Sorry, I got off track. Anyway, there are lots of ways to cool our bodies down. 1 is stuck in an air-conditioned room. 2, is to keep ourselves hydrated with cups of tea. Especially this chrysanthemum tea. You can google the health benefits of chrysanthemums. One of which in particular is helping to cool our bodies down, especially in this scorching hot wave. You can probably find all the ingredients in a Chinese grocery store. Or try Amazon. Chrysanthemum gives off this wonderful floral aroma and flavor. Some like it hot... You have to give it a try to find out for yourself. Cheers! Ingredients: (Serve 2) Chrysanthemums, 25g Wolfberries / Goji Berries, 15g Jujubes (Chinese Dried Red Dates), Pitted, 4 Rock Sugar, 25g Adjust To Preference Equipment: Sauce Pot Directions: Soak chrysanthemums, wolfberries and dates in 750g of water for 15 mins. Turn the heat up to medium and bring it up to a simmer. Once it starts to simmer, turn the heat down to low. Slow simmer for 15 mins. Remove from heat, strain into serving cups. Serve immediately. If you would like to serve it cold, you can keep chill in the fridge and pour over some chrysanthemum ice cubes. Cheers! Some like it cold... Recipe Video:


Recipe Index
By Cuisine
Vietnamese
By Dish Type
By Main Ingredients
By Other Special Collections