
Homemade Pocket Pita Bread Recipe

About This Homemade Pocket Pita Bread
What It Is: Homemade yeast-leavened pita bread cooked in a cast iron skillet until it puffs into a balloon, creating a hollow pocket that can be opened and stuffed with fillings.
Cuisine: Middle Eastern-inspired pocket pita, drawing on flatbread traditions found throughout the Middle East and eastern Mediterranean. This is a home-kitchen adaptation rather than a recipe attributed to one particular country.
Servings: 8 pita breads, approximately 106g of dough per pita before cooking.
Cooking Method: Hand-kneading, yeast fermentation, dividing, rolling, resting, and dry skillet-cooking with gentle pressing and repeated flipping.
Estimated Time: Approximately 20–30 minutes of active preparation, 1–1½ hours for the first rise, 15–20 minutes of resting after shaping, and approximately 2–4 minutes of cooking per pita. Allow around 2½–3 hours overall.
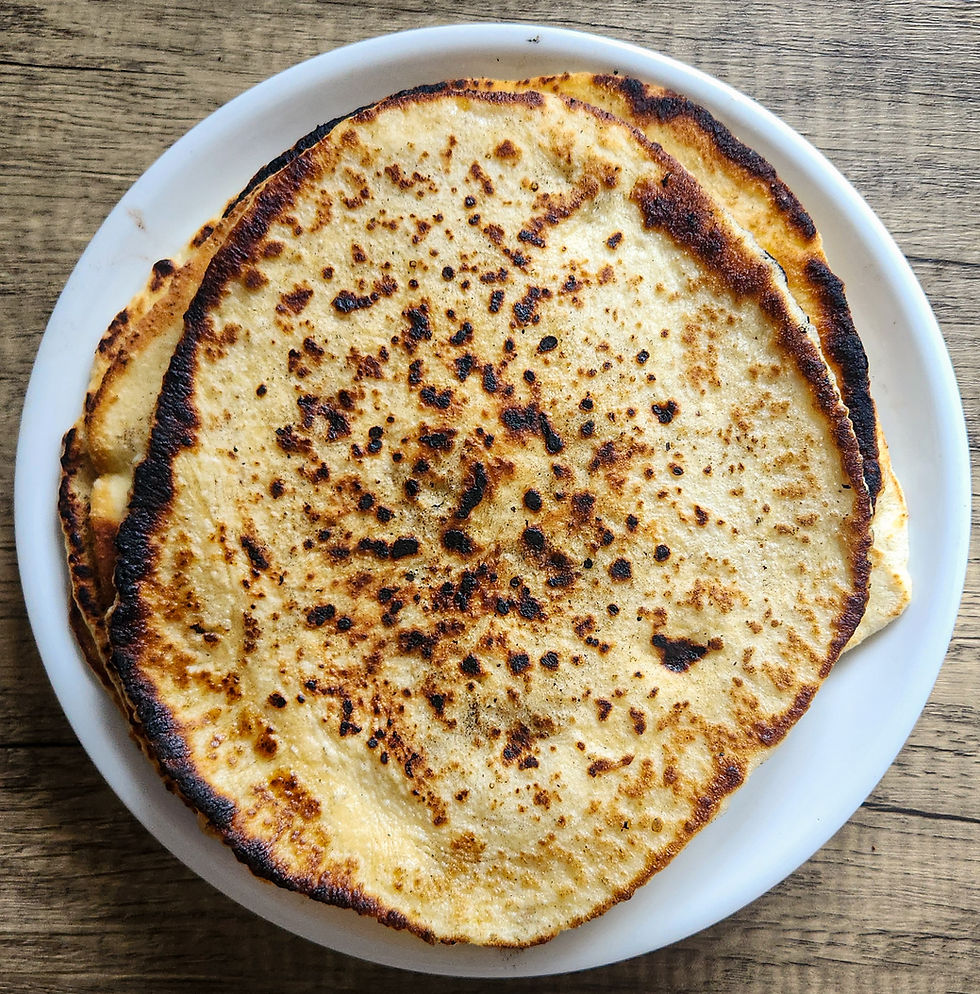
Flavor & Texture: Mildly savory wheat flavor, soft and flexible bread with lightly browned surfaces, tender interior layers, and a hollow pocket suitable for stuffing.
What Makes This Version Different: Rather than relying on an oven, this recipe uses a cast iron skillet to cook the pita. Gentle pressing, tapping, and repeated flipping help encourage even heating and puffing. The result is pocket-style pita rather than the thicker, pocketless flatbread commonly used for Greek gyros.
Equipment: Cast iron skillet, large mixing bowl, spatula, kitchen scale, rolling pin, clean work surface, and a lint-free kitchen towel.
I've been wanting to make proper pocket pita bread for a while now. Not the soft, pocketless Greek-style flatbread commonly wrapped around gyros, but the kind that balloons up during cooking and leaves a hollow pocket inside. The kind you can slice open and stuff with just about anything.

And since I've been experimenting with lamb recipes lately, I had something very specific in mind: arayes. But before I could get to that, I needed to figure out how to make the pita itself. It looks simple enough, doesn't it? Flour, water, yeast, sugar, and salt. Nothing particularly fancy. Then you place a flattened piece of dough on a hot surface and somehow, almost magically, it inflates like a balloon. Well, I wanted to see that happen in my own kitchen.

Pita has a long history across the Middle East and the eastern Mediterranean, where flatbreads have been part of everyday cooking for thousands of years. The word *pita* is commonly associated with several types of flatbread, although their shapes, textures, and uses differ from region to region.
Pocket-style pita is especially familiar in Levantine and other Middle Eastern cuisines, where it is used to scoop up dips, accompany grilled meats, and hold fillings such as falafel and shawarma. The pocket forms when intense heat causes moisture inside the dough to turn rapidly into steam, separating the bread into two layers.

As the bread cools, it deflates, but the separation remains. That's what creates the pocket. Greek-style pita used for gyros is often made thicker and softer, without the same pronounced hollow center. Neither version is better than the other; they're simply suited to different purposes.
Naturally, I decided to experiment. I tried baking the pita in the oven first, expecting it to puff up beautifully. Well, that didn't quite happen. The bread cooked, but it didn't balloon the way I wanted.

So I switched to my cast iron skillet, and that's when things got interesting. Instead of leaving the dough alone, I gently pressed and tapped it with a spatula, flipping it repeatedly as it cooked. Gradually, the bread began to puff, and eventually it inflated into a beautiful little balloon.
Success! The skillet gave me more direct control over the heat and allowed me to encourage the dough to expand without burning it. Once removed from the heat, the pita naturally deflated, leaving behind that wonderful pocket. And that's exactly what I needed for my next recipe: arayes, a Middle Eastern dish featuring pita stuffed with seasoned minced meat and cooked until crisp. But first, let's make the bread!

Ingredients:
(Make 8)
Water, 320g
Active Instant Dry Yeast, 7g
Unbleached Bread Flour, 500g
Granulated Sugar, 15g
Sea Salt, 9g
Olive Oil, For Greasing
Equipment:
Cast Iron Skillet
Directions:
Prepare the Dough
Gently warm the water until lukewarm, approximately 35–40°C / 95–104°F. The water should feel comfortably warm, not hot.
Add the instant dry yeast to the water and stir to disperse it evenly. Instant yeast doesn't require activation beforehand, but mixing it with the water works perfectly well for this recipe.
In a large mixing bowl, combine the bread flour, granulated sugar, and sea salt. Stir thoroughly to distribute the ingredients evenly.
Create a well in the center of the dry ingredients and pour in the lukewarm yeast mixture.
Using a spatula, mix until the ingredients begin coming together into a rough, shaggy dough. It's perfectly fine if the mixture looks uneven at this stage.
Begin kneading inside the bowl, gathering any remaining flour or dough stuck to the sides and bottom.
Once the dough becomes more cohesive, transfer it to a clean work surface dusted very lightly with flour.
Continue kneading for approximately 5–8 minutes, or longer if necessary, until the dough becomes smooth, elastic, and tacky but not excessively sticky.
Avoid adding too much flour while kneading. Excessive flour can make the pita dough stiff and difficult to stretch, resulting in a tougher finished bread.
To check gluten development, perform the windowpane test. Pinch off a small piece of dough and gently stretch it between your fingers. The dough should stretch into a thin, almost translucent membrane without tearing immediately. If it breaks easily, continue kneading and test again.
First Rise
Lightly grease the mixing bowl with olive oil.
Shape the dough into a smooth ball and place it inside the greased bowl. Turn it gently to coat the surface with a thin layer of oil.
Cover with a clean, damp, lint-free kitchen towel and allow the dough to rise in a warm, draft-free area for approximately 1–1½ hours, or until doubled in volume.
Rising time will vary depending on room temperature and yeast activity. In a warm kitchen, the dough may rise faster than expected.
Divide, Shape, and Rest
Once the dough has doubled in volume, gently press it down to release some of the accumulated gas.
Transfer the dough to a lightly floured work surface and weigh it.
Divide into 8 equal portions, approximately 106g each.
Shape each portion into a tight, smooth dough ball by gently stretching the surface and tucking the edges underneath.
Using a rolling pin, roll each dough ball into a round disc approximately ⅛ inch / 3mm thick.
Try to maintain an even thickness throughout each disc. Unevenly rolled dough may puff irregularly or fail to develop a complete pocket.
Transfer the rolled discs to a lightly floured surface, keeping them in a single layer.
Cover with a clean, lint-free kitchen towel and allow them to rest for approximately 15–20 minutes. This helps relax the gluten and gives the dough a little time to recover after rolling.
Cook the Pita in a Cast Iron Skillet
Place a dry cast iron skillet over medium heat and allow it to preheat thoroughly. The skillet should be hot enough to generate steam quickly when the dough is added, but not so hot that it immediately scorches the surface.
Pick up one dough disc and gently transfer it between your hands to shake off excess flour. Avoid stretching or tearing the dough.
Carefully lay the disc flat onto the heated skillet.
Using a spatula, gently press and tap different areas of the dough for approximately 15 seconds. Avoid pressing hard enough to flatten or damage the dough.
Flip the pita and repeat the gentle pressing and tapping on the other side.
Continue flipping the pita periodically, applying gentle pressure where necessary to encourage even contact with the skillet.
As the dough heats, you should begin noticing small bubbles forming beneath the surface. These may gradually expand as steam develops inside the bread.
Once the pita begins inflating, stop pressing directly on the expanding pocket. Allow the trapped steam to separate the layers naturally.
Continue flipping as necessary to promote even browning without burning either side.
If everything goes well, the pita should balloon into a rounded, inflated shape. Don't worry if some puff more dramatically than others.
Remove the pita from the skillet once both sides are cooked, lightly browned, and no raw dough remains. Each pita will generally take approximately 2–4 minutes, depending on skillet temperature and thickness.
Transfer the cooked pita to a plate or cooling rack. The pita will begin deflating as it cools. This is completely normal.
Cover the cooked pita with a clean kitchen towel to help retain moisture and keep it soft while you cook the remaining dough.
Repeat with the remaining discs, adjusting the skillet temperature as necessary. If the bread browns too quickly before puffing, reduce the heat slightly. If it cooks slowly without developing bubbles, the skillet may need more heat.
Once cool enough to handle, slice a pita in half and gently open the hollow center to reveal the pocket.
Serve warm with your favorite fillings, or save some for my upcoming Arayes, featuring pita stuffed with seasoned minced meat and cooked until crisp.

Tips:
Use bread flour for structure.
Bread flour contains enough protein to develop a strong, elastic gluten network. This helps the dough stretch and expand as steam forms during cooking.
Instant yeast doesn't need to be activated separately.
You can mix instant yeast directly into the flour or disperse it in lukewarm water, as I've done here. Both methods work.
Don't use excessively hot water.
Aim for approximately 35–40°C / 95–104°F. Water that's too hot can damage the yeast and interfere with fermentation.
Don't add too much flour while kneading.
The dough should be smooth, elastic, and tacky. Adding excessive flour can make it stiff and produce a tougher pita.
Develop the gluten properly.
Well-kneaded dough is more elastic and better able to stretch without tearing. The windowpane test is a useful way to check gluten development.
Allow the dough to double in volume.
The first rise develops the dough and gives the yeast time to produce gas. Don't rush this stage, but avoid overproofing.
Divide the dough evenly.
Weighing each portion helps the pita cook consistently. This recipe makes eight portions of approximately 106g each.
Roll the dough evenly.
Uneven thickness is one of the reasons pita may inflate on one side while remaining flat on the other. Aim for a consistent thickness of approximately ⅛ inch / 3mm.
Avoid tearing the dough.
Small holes can allow steam to escape, preventing the pita from inflating fully. Handle the discs gently, especially when transferring them to the skillet.
Let the rolled discs rest.
Resting for 15–20 minutes allows the gluten to relax after rolling and gives the dough a short final proof before cooking.
Preheat the skillet thoroughly.
Pita relies on rapid steam generation to form its pocket. A skillet that isn't hot enough may cook the bread without producing the dramatic ballooning effect.
Don't make the skillet smoking hot.
Excessive heat can scorch the exterior before the dough has enough time to inflate. Start with medium heat and adjust according to how the pita behaves.
Gently press and tap the dough.
Light pressure with a spatula can improve contact with the skillet and encourage even heating. However, pressing too firmly can damage the developing pocket.
Stop pressing once the pita begins inflating.
Once steam starts separating the layers, allow the bread to expand naturally. Continuing to press directly on the ballooning area can force steam out or tear the dough.
Flip the pita for even cooking.
Repeated flipping helps distribute heat between both sides, especially when cooking on a skillet rather than in an oven.
Don't panic if the pita deflates.
Deflation is completely normal. The bread inflates because of steam, and as it cools, the steam condenses. The pocket remains inside.
Cover the cooked pita with a towel.
This helps retain moisture and keeps the bread soft and flexible instead of allowing it to dry out.
A skillet isn't the only way to make pocket pita.
A sufficiently hot oven with a thoroughly preheated baking surface can also produce excellent puffing. My oven attempt didn't work as well as my skillet method, but that doesn't mean oven-baked pita cannot develop pockets.
Use the pockets for sandwiches.
Unlike the thicker, pocketless flatbread commonly used for Greek gyros, these pita breads are designed to be sliced open and stuffed with fillings such as falafel, grilled meat, vegetables, or arayes.

Baking in the oven doesn't work as well...
FAQ:
What is pocket pita bread?
Pocket pita is a type of flatbread that develops a hollow center during cooking. The pocket forms when steam separates the dough into two layers, making the bread suitable for stuffing with meat, vegetables, falafel, and other fillings.
What's the difference between Greek pita and Middle Eastern pocket pita?
The thicker, softer Greek-style pita commonly used for gyros is generally served as a wrap without a pronounced pocket. Middle Eastern pocket pita is typically thinner and cooked in a way that encourages it to inflate and develop a hollow interior. Both styles have regional variations, so the distinction isn't absolute.
Why does pita bread puff up?
When the dough encounters a sufficiently hot cooking surface, moisture inside rapidly turns into steam. The steam expands between the dough's layers, causing the bread to inflate like a balloon. As the bread cools, the steam condenses and the pita deflates, leaving the pocket behind.
Why didn't my pita puff up?
Several factors can prevent proper puffing, including an insufficiently heated skillet, unevenly rolled dough, tears in the surface, excessive drying during resting, or inadequate gluten development. Start by checking the skillet temperature and making sure each disc has an even thickness.
Can I bake pita bread in the oven?
Absolutely. Pocket pita is traditionally well suited to very hot ovens. A thoroughly preheated baking stone, steel, or inverted baking sheet can help deliver the rapid heat needed for puffing. My oven attempt didn't inflate as successfully as my skillet version, which is why I'm sharing the skillet method.
Why did the skillet method work better for you?
The skillet gave me more direct control over the cooking process. I could gently press the dough to improve contact, flip it when necessary, and adjust the heat as it cooked. That combination helped me achieve more consistent puffing in my kitchen.
Do I need a cast iron skillet?
No, although cast iron works well because it retains heat effectively. A heavy-bottomed skillet or suitable griddle can also work. You may need to adjust the heat and cooking time depending on the pan.
Should I add oil to the skillet?
No. This recipe uses a dry skillet. The olive oil is only for lightly greasing the bowl during fermentation.
Why do you use bread flour instead of all-purpose flour?
Bread flour generally has a higher protein content, allowing it to develop a stronger gluten network. This gives the dough elasticity and helps it stretch as steam expands inside. All-purpose flour can also make pita, although the dough may handle differently.
Can I use whole wheat flour?
Yes, but replacing all the bread flour with whole wheat flour will change the texture and water absorption. For a first experiment, try replacing a portion of the bread flour with whole wheat flour and adjust the water if necessary.
Is sugar necessary?
Sugar provides a little sweetness and can support fermentation, but yeast can also ferment the sugars naturally available from flour. This recipe uses a modest amount of sugar, and the finished pita shouldn't taste noticeably sweet.
Do I need to use instant yeast?
Instant yeast is convenient because it can be mixed directly into the dough. Active dry yeast can also work, but follow the manufacturer's instructions and expect possible differences in rising time.
Why do I need to knead the dough?
Kneading develops gluten, giving the dough the strength and elasticity needed to trap gas and stretch during cooking. Insufficiently developed dough may tear more easily.
Why do I need to rest the rolled pita before cooking?
The short rest allows the gluten to relax and gives the dough time to recover after shaping. It also provides a brief final proof. Keep the discs covered so they don't develop a dry surface.
How thick should I roll the pita?
For this recipe, aim for approximately ⅛ inch / 3mm. More importantly, keep the thickness consistent across the entire disc. Uneven thickness can cause irregular puffing.
Why does the pita deflate after cooking?
That's completely normal. The inflated shape is maintained by steam pressure. As the pita cools, the steam condenses and the bread collapses, leaving the internal pocket.
Can I still eat pita that doesn't puff?
Of course! As long as the bread is properly cooked, it's perfectly edible. It may not have a complete pocket, but you can still use it as a flatbread or wrap.
Can I prepare the dough ahead of time?
Yes. After kneading, you can refrigerate the covered dough for a slower first rise. Allow it to complete fermentation as needed before dividing and shaping. The timing will depend on your refrigerator temperature and dough activity.
Can I freeze the dough?
Yes. Divide the dough into portions after the first rise, wrap them well, and freeze. Thaw in the refrigerator, then allow the dough to relax and become sufficiently proofed before rolling and cooking. Frozen dough may rise more slowly, and the puffing may be less consistent than with freshly prepared dough.
Can I freeze cooked pita bread?
Absolutely. Allow the pita to cool completely, stack with parchment paper between pieces if necessary, and store in an airtight freezer-safe bag. For best quality, use within approximately 2–3 months.
How should I store homemade pita?
Store completely cooled pita in an airtight bag or container. It's best enjoyed fresh, ideally within 1–2 days at room temperature. For longer storage, freezing is preferable, especially in a warm and humid climate.
How do I reheat pita bread?
Warm it briefly in a skillet over low to medium heat or in a covered oven-safe dish until heated through. Avoid overheating, as this can dry out the bread and make it brittle.
What can I stuff inside pocket pita?
Try falafel, shawarma-style chicken, grilled lamb, hummus, roasted vegetables, salad, or seasoned minced meat. I'll be using mine for arayes, a delicious Middle Eastern preparation involving pita stuffed with seasoned meat and cooked until crisp.

So good that you can even eat this on its own...


Comments